Thursday, February 28, 2013

A Creative Challenge--Part II

As promised, here is Marian to show us her kit project and tell us about it.  If you missed Part I, my project with Marian's kit, click here.
 
Marian Making Making Marian's Kit
 
Hello!  I'm happy to join you as Lisa's guest.
 
As Lisa mentioned, we are always excited about our kits.  This is such fun, so grab a friend and do the same!  Actually, I believe every year I've had a harder time with the kit I've put together.  We use materials we have on hand, so they are obviously things we are used to working with.  I think it's harder for me to get outside my box when I'm using such comfortable items.  This year was no exception.
 
Lisa showed you the materials I put in my kit.  There was a portion of a fabric jelly roll, some small squares of felt, buttons, sequins, and some thin cardboard 'squares'.
 
I failed to get very creative with this kit.  My first thought was to make zippered cosmetic bags.  Not very original.  I was going to quilt the fabric, embellish it with the sequins and buttons and sew the cardboard squares together to make a box to put them in.  I actually sewed the strips together to make a piece of fabric large enough to cut the first bag.  While lying in bed thinking about it, I decided I wanted to go in another direction.  My next idea also wasn't all the unique, but one I'd never done and thought it would be fun to attempt.  So I got up, grabbed my piece of fabric and took the stitch ripper to all the seamed strips and disassembled it.  I had decided to make a fabric basket.  The only basket I had ever made was one with reeds in a crafts class in junior high school, which was a very long time ago.....


I ended up making a fabric coiled basket.  I stitched the fabric strips together along the narrow end and wrapped it around some cord I had on hand.  Then I wound the coil round and round forming the basket, hand-stitching it as I went along.  I added a handle that I made with cord that I braided.  I sewed a few additional strips together to make ribbons, and I used the felt for little flowers and the buttons and sequins for embellishments.


I wasn't sure what to do with the cardboard.  I considered cutting a circle and stitching or gluing it to the bottom like is sometimes done to help items stand straight, but decided that was a bad idea.  In the end, I covered a couple pieces with fabric, made another fabric ribbon to latch the cardboard together and made a card.  They turned out cute enough.  I filled Lisa's basket with some Hershey's Kisses and miniature Snickers for a Valentine's treat and called it good.


It was a fun project and the result was just fine.  It would take many more attempts to make them very even and to perfect them, but I was happy enough with my first attempts.  I'm considering making a couple more for my two youngest granddaughters for Easter, so it was a skill learned that may be useful again.  Not my most creative attempt by miles, but one that was fun and cute enough to not be assigned to the trash...my way of handling failure.
 
First attempt on the left.  Second on the right.   
***********************************************************************************
 
Thanks, Marian, for sharing your creative journey with us!  I love your project! 
 
This is such a fun activity for anyone who is creative.  You might want to grab a friend and try it yourself!  Next week we will be posting the projects we made with the kit I assembled.  From time to time we will 'catch up' with all the projects we have done in the past.
 
We would love to hear your comments about our kits and the finished projects.  We are NOT competive at all when it comes to these kits.  We never declare a 'winner'.  We truly enjoy seeing what we each come up with.
 
Thanks for stopping by!
Have a great day!
Lisa 


Wednesday, February 27, 2013

A Creative Challenge

Each Christmas for the past few years my friend Marian and I exchange 'kits'.  (We give each other real presents, too, but this is one of our most anticipated parts of our holiday gift boxes!).  It started a few years ago when I was having a creative struggle and I was wanting to challenge myself to try new things.  I had the idea that we should each put together a collection of five random supplies and we would each come up with a project using those supplies.  We put together a few 'rules', giving us plenty of creative freedom, but also adding some structure to the project.

Here are the rules:

1.  We each put together a kit of five random supplies.  We are not allowed to purchase anything for the kits, since we each have an over-abundance of supplies on hand. 

2.  There should be enough supplies in each kit to execute two projects--one to keep, one to give.

3.  We are allowed to add up to three additional supplies to the kit. 

4. Certain basic supplies are 'free'.  Paint, adhesives, any fasteners, ink, etc.  We can also add more of a given supply.  For example, if buttons are in the kit, we can use as many more buttons as we want

5.  Projects must be completed by Valentine's Day.  (This rule is flexible, but we generally shoot for some time in February.)

So, today I am going to share my experience with the kit Marian put together.  Tomorrow Marian will be guest blogging about her own project.  Here goes:


Marian's Kit
Three wool felt squares
A pile of thin cardboard pieces, 4-7/8" x 5-3/8"
An assortment of buttons
A small bag with about a jillion sequins
A jelly roll (which is a roll of fabric strips 1-1/2" x 22")

I don't sew.  Well, I can sew, but not well.  Marian sews.  Well.  Her kits almost always include fabric, so I'm always trying to find a creative way to use it without having to sew anything. 

I tossed around several ideas for this kit.  Most of them were lame and I can't even really remember what they were.  I could do a mixed media collage, which seemed a little predictable.  Then I had what I thought was a great idea....paper dolls!  I could cut the dolls from the cardboard, make some little clothes from the fabrics, trim them with the embellishments, add some fiber for hair and maybe even a polymer clay face.  Sounds great, right?  Well, here is what I came up with:


Oh, wait!!  Those aren't paper dolls!!  Yeah, well, when I sat down to start that project I discovered that it was going to be far too much work for the timeframe of the project.  So I changed courses midstream and came up with this mobile instead. 


Here is what I did:

I used my Cricut machine to die-cut three different shaped flowers from the cardboard.  Then I covered each flower, front and back, with fabric.  My jelly roll had prints in pink, turquoise, red, yellow, and white.  I chose to use a red, turquoise, and pink color scheme for one mobile, and a pink, yellow, and turquoise for the other. 

I used the felt squares to cut centers for the flowers.  Marian had included turquoise, red and olive green.  I have wool felt in my stash of supplies, so I added pink to match some of the fabrics. 

I accented the flower centers with buttons.  I used all of the ones Marian included and had to dig through my button boxes to have enough.  At first I only put the centers on one side of the flowers, but as I was assembling the mobile, I realized that they needed to be on both sides. 

The sequins were my real 'challenge' in this kit.  In the end I sorted out the flower shaped ones and strung them on to the fishing line.  That seemed a little bit like a cop-out, so I also glued them on to the centers of the buttons.  I didn't even come close to using them all, but I had used enough to satisfy the challenge.

To assemble the mobile, I added these three supplies:


Not a good picture, sorry.  I used a 4" wooden embroidery hoop, a piece of nylon mesh that came wrapped around a turkey (I save all sorts of 'junk'--you just never know!), and a piece of ribbon.

I stretched the nylon mesh between the hoop so I would have something to dangle the flowers from.  I trimmed the hoop with the ribbon.  Then I tied the flowers on using varying lengths of fishing line. 

The biggest challenge of this project became how to hang the mobile so the hoop would stay relatively level.  In comes my husband, David, who is very good at engineering things like this.  We developed a plan to tie more fishing line in four places and then string it up through a four-holed button.  Then I tied the ends to a ring so it could hang from a cup hook.

As per the rules, I made two.  One to keep.  One to give to Marian. 


I gave Marian the pink one, because she has little accents of pink in her studio.  The red and turquoise one worked best in my studio.

I am really pleased with how this project turned out.  I'm excited to have Marian here tomorrow, to show and tell her project.

Happy Wednesday!
Lisa

PS...Sorry about the quality of the photos.  It was back to the point and shoot for this project.


Tuesday, February 26, 2013

A Pretty Pair of Bunnies

Spring is coming, right?  After 9 inches of snow last week, I'm hoping it is coming soon!  (Truth be told, I don't HATE snow.  I actually sort of like it.  Of course, I don't have to go out in it if I don't want to, since I work from home.  But it's getting to be that time of year when I am longing for spring.)

With spring, comes Easter, and Easter is early this year.  Did you know that already?  I checked a few weeks ago so I could plan my spring accordingly. Which of my spring shows will fall before Easter and which will be after?  How many bunnies will I need to make? 

This pair of bunnies is actually left from last year, but I love them so much I wanted to share them.  Don't they make a lovely couple?


These two adorable bunnies are currently available in my etsy shop.  Click here to find the boy.  Click here to find the girl. 
 
I've been working on this year's batch of bunnies and hope to have some new ones to show you very soon.
 
Have a great day!
Lisa


Friday, February 22, 2013

Friday Favorite--Whitney Smith Pottery

Did you miss the Friday Favorite feature last week?  I did!  So here I am, back with another favorite etsy shop, Whitney Smith Pottery.

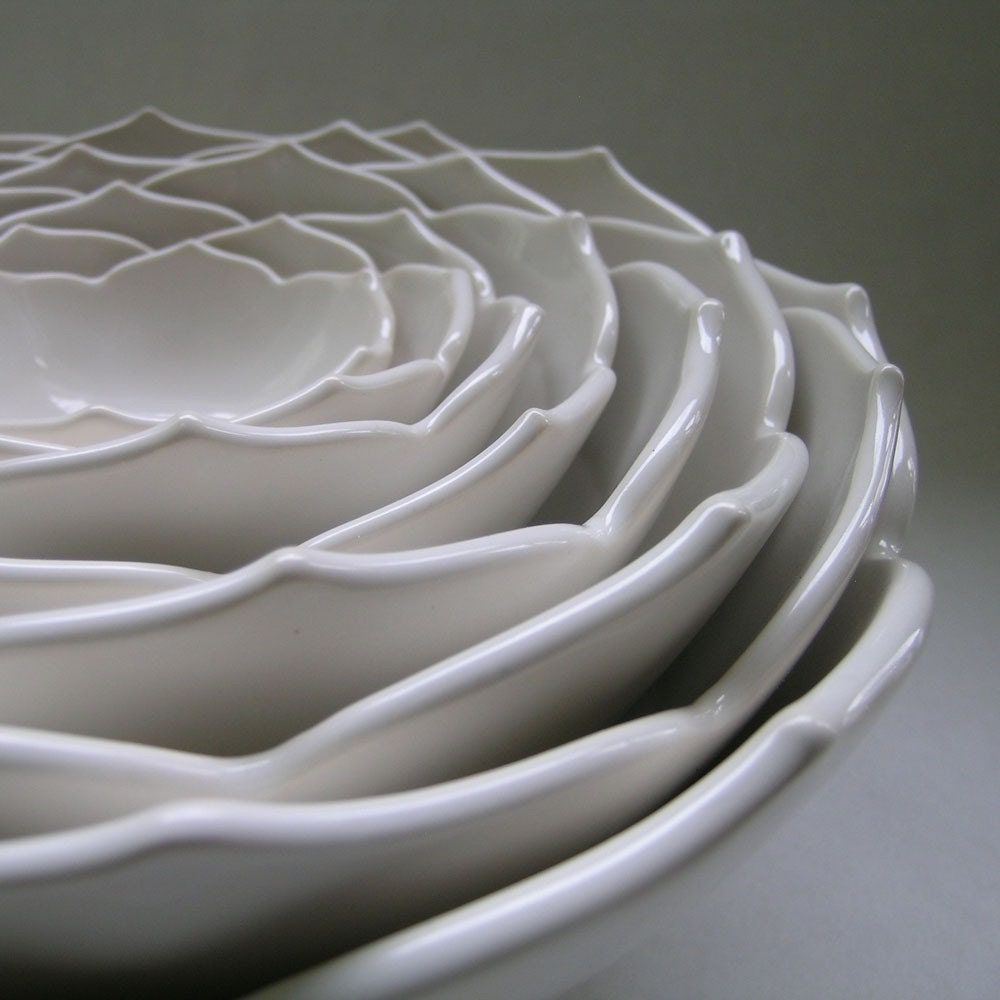
I discovered Whitney's pottery long ago, when I was making a treasury on etsy and I featured her nesting lotus bowls.  I love her simple, modern take on ceramics.  Her exquisite work is both beautiful and functional and would look lovely in any home setting, both traditional and modern.  Her palette of colors is delicious, and her simple shapes are very pleasing. I think you will enjoy her work, and I urge you to go have a look around her etsy shop.

She has over 100 items available, but of course, I have to narrow that down to a few of my favorites.  NOT an easy task, but here goes:

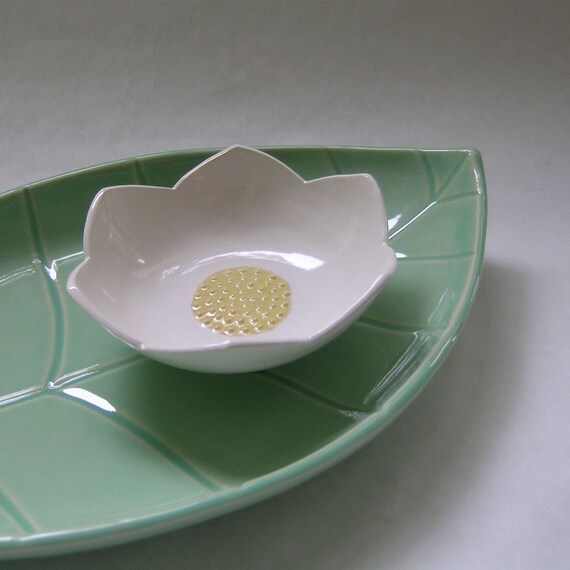
 Leaf Platter and Lotus Bowl Ceramic Set
 
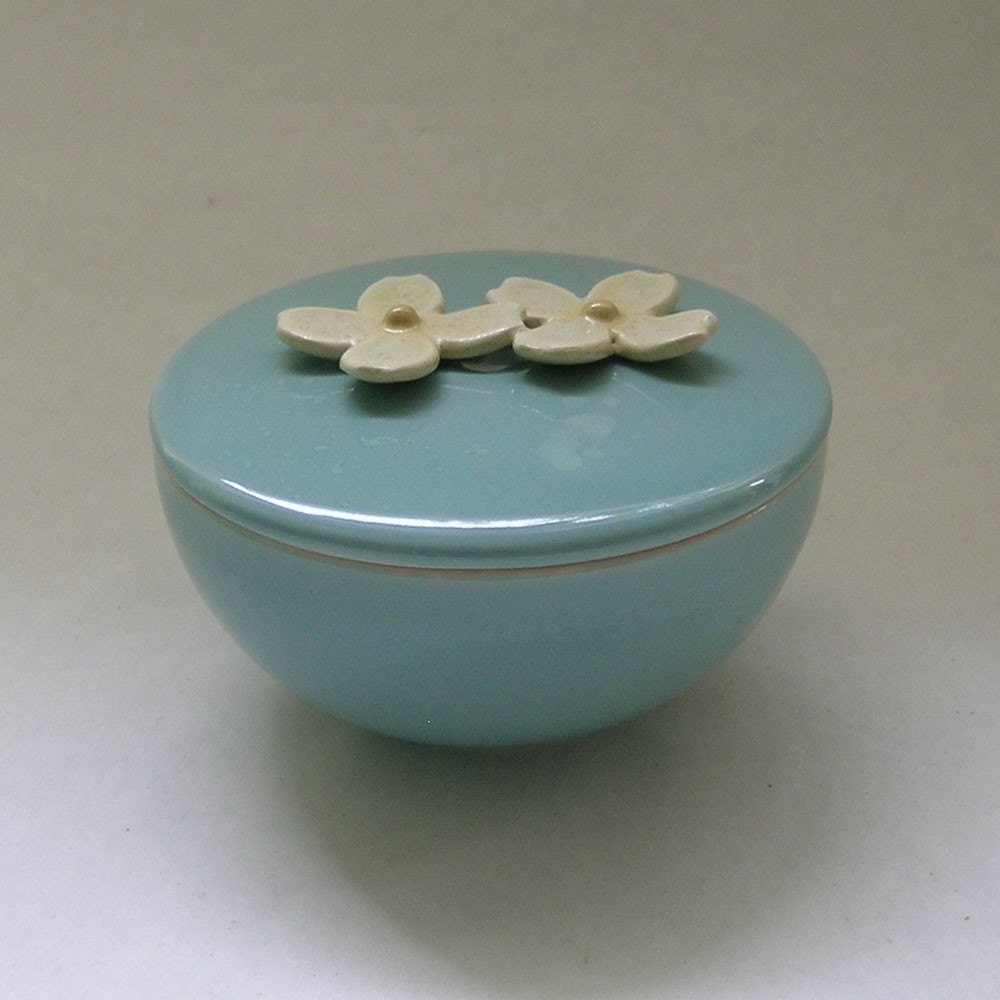
Ceramic Lidded Vessel with Dogwood Flower in Robin Egg Blue
 
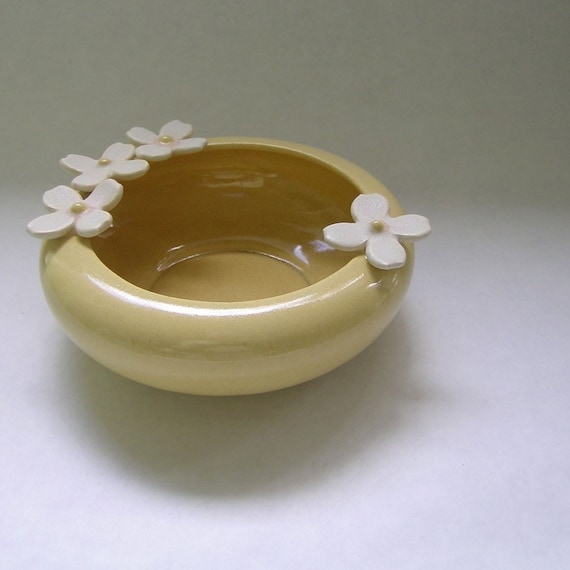
Dogwood Flower Ceramic Bowl in Yellow
 
Nesting Ceramic Lotus Bowls Set of Eight
 
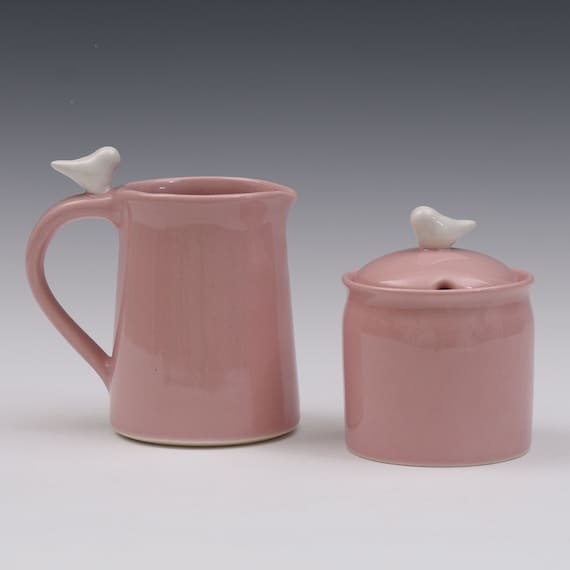
Bird Sugar Bowl and Creamer Ceramic Set For Entertaining, Hostess, Kitchen, Dining
 
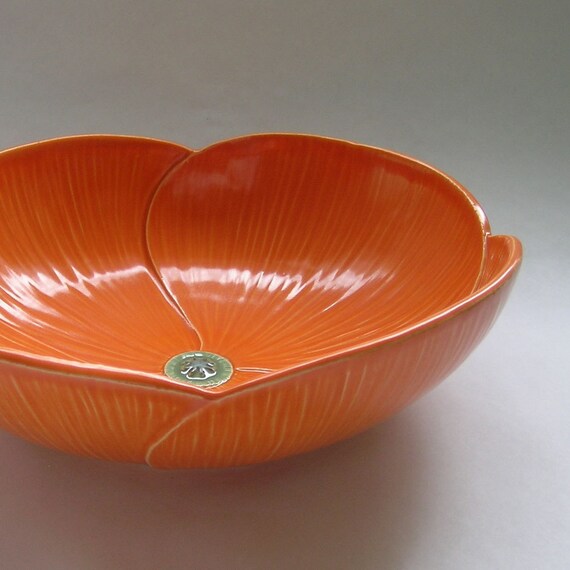
Ceramic Serving Poppy Bowl, Centerpiece, Fruit Bowl
 
 
OK--was I right, or what?  Don't you just love Whitney Smith Pottery?  It is form and function at its very best!
 
Have a wonderful weekend! 
Lisa


Wednesday, February 20, 2013

Mixed Media Collage

I've been slow to get back to my blog since my trip to New Mexico.  I'm sorry about that!  I sort of crashed when I got home last week and this week I've been madly working on a custom order that has proven to be a bit of a challenge.

I had a great time in New Mexico with my friend, Marian.  We have the sort of friendship that we can do nothing and it's still a load of fun!  When we get together for our annual visit it generally includes watching lots of movies, eating lots of yummy food that is NOT good for you, talking, talking, talking, and some sort of creative project.

This year we were not very inspired.  I don't know why, but I think partly because we didn't have a plan beforehand.  Generally before I arrive we come up with an idea or a medium we would like to try so we can hit the ground running.  Well, this year we didn't do that.  We learned our lesson there.  We will plan ahead better next time.  We didn't even get started on anything creative until several days into my week's stay.  (Possibly we were too distracted by her new Endless Wave swimming pool??)  So, we finally decided we would just try to do some mixed media collages using things she had stashed in her studio. 

Here is what we came up with:


This was my first attempt.  I did some color washes with acrylic paints, added some scrunched up tissue paper and this interesting material that is actually used to make casts.  I attempted to make some textural patterns using glue, but that didn't work out so well.  I added a little bling with glitter.  All in all, not bad, but certainly not a masterpiece.  Here is a little close up view:

 
You can see a little bit of the texture and the sparkle of the glitter.
 
I would like to show you Marian's first attempt, but it's somewhere in a dumpster in New Mexico.  She got frustrated and threw it away!  I admire that sort of courage!  I will often make myself miserable in an attempt to get it 'right'.  Not Marian!  If she knows a project is headed on a course that she can't correct, she is perfectly willing to toss it and begin again.
 
This is her second attempt:
 
 
She also used the casting material, tissue, paints and glitter.  She added letters cut from the newspaper to add the sentiment LISTEN. 
 
I wanted one more try at this project, so I started with a long skinny canvas and covered it with newspaper.  I liked the graphic quality of the type.
 
 
I did some colorwashing over most of the sections of newspaper.  I used some very thin chipboard and drew patterns on it with a good ol' black Crayola crayon, then I washed over it with watered down paint.  The wax of the crayon caused the paint to resist.  I was able to pull out the right letters from a headline to put together my phrase.  Everything was looking a wee bit too linear, so I found two different sized plastic caps, brushed paint on them, and stamped on the circles.  I coated the entire piece with a gloss finish Mod Podge.  Again, not the greatest piece of art I have ever made, but I like it nonetheless.
 
Marian and I are both creative people.  We met when our booths were next to each other at a craft show a LOOONG time ago and hit it off immediately.  We enjoy working on projects and trying things that are outside our comfort zone.  Stay tuned next week, when we talk about our 'kits'. 
 
OK, I have to get back to the custom order that is giving me fits. 
Have a great day!
Lisa


Thursday, February 14, 2013

Happy Valentine's Day!

This year I had bees buzzing in my head for Valentine's Day.  I showed you one of them here.  Well here is another version of Bee My Valentine, sculpted in polymer clay.  He is still available in my etsy shop.


With the bee theme in mind, I also made this really cute Valentine card:
 
 
I used my Cricut machine with the A Walk Through My Garden cartridge to cut the bee and the turquoise flower.  The yellow fringy flower is a premade brad from American Crafts.  I love the glittered heart stickers from K&Company. 
 

This inside message, BEE mine, was stamped with black ink using acrylic stamps from two collections:  Mile High Caps from Clearly Wordsworth, and Writer's Type from The Paper Studio.

This card, along with some made-from-scratch chocolate chip cookies, is for my Valentine. 

I hope you all have a lovely Valentine's Day! 
Lisa


Monday, February 11, 2013

Another Frog Prince

I've blogged about Frog Prince Charming before (you can read that post here).  He's become a favorite character of mine, and I've made several versions of him.  He also seems to be very popular with customers because he gets snapped up rather quickly.  Must be something about that fairy-tale ending we are all wishing for....


I intended to get Frog Prince and two other whimsical characters listed on my Pfatt Marketplace page for this month before I left for New Mexico.  I wrote the listings, uploaded the photos, and saved it on my computer.  Unfortunately, the listings were due by February 7th to make the deadline for publishing, and I FORGOT TO SEND IT BEFORE I LEFT TOWN!!  And of course it is saved on my computer, which is at home....I only traveled with my iPad.  OOPS!  I guess those listings are ready for next month....

Anyway, I hope you had a great weekend!  I'm still here in New Mexico with my BFF Marian, having a great time, as always! 

Lisa


Tuesday, February 5, 2013

A Little Bit of Romance

Valentine's day is quickly approaching, and Romeo is ready!


This charming tuxedo cat is dressed up in a fancy crepe paper collar with a dotted satin bow and sparkling Swarovski crystals down his front.  He is carrying a lovely bouquet of bright pink satin ribbon roses.  Who could resist this handsome fellow?

You can find Romeo here, in my etsy shop.

I'm heading off to New Mexico early tomorrow morning for my annual visit with my BFF Marian!  YAY!!  We always have such a great time!  I hope to be here a time or two while I am gone, to share some of our fun.  We always make time for some creative project.  No idea what it will be this year, but we always come up with something!

I'll talk to you soon!
Lisa
Friday, February 1, 2013

Friday Favorite--Arlene's Boutique

It's Friday!  It's also COLD COLD COLD here in my town.  Below zero wind chill factors.  YIKES!! I don't even like to go out in the cold, but when I do, I certainly bundle up.  It got me searching around on etsy for some cute winter scarves.  I found Arlene's Boutique and knew I just had to share!

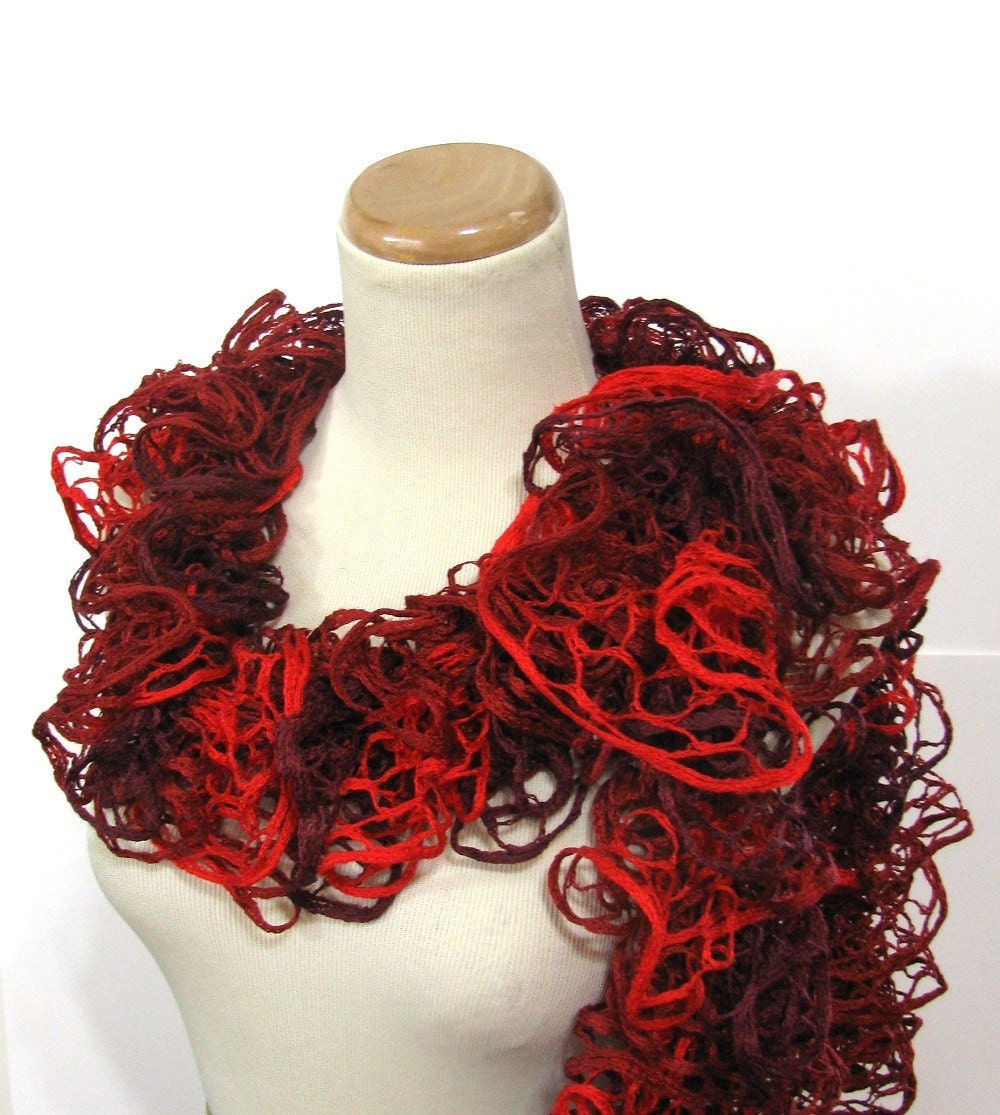
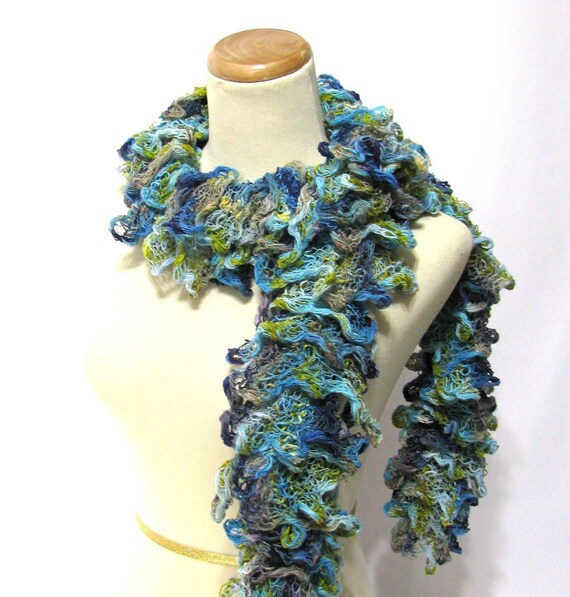
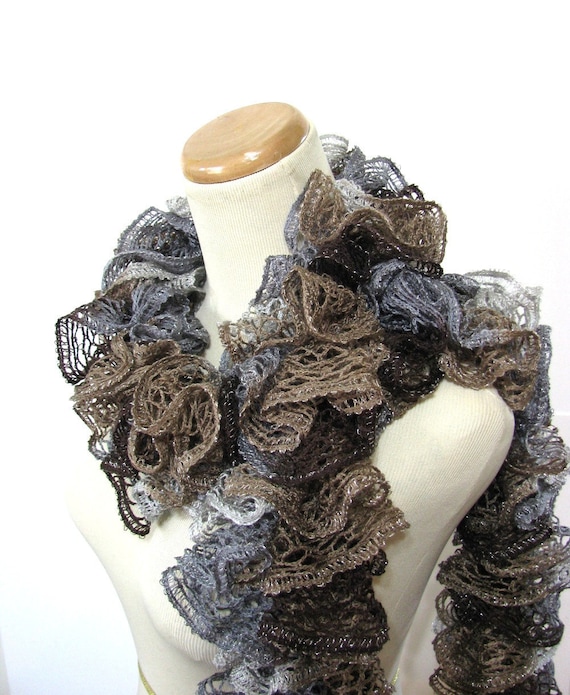
Arlene's scarves are probably more about fashion than warmth, but they are wonderful!!  She has a whole range of styles and colors and yarns available.  I'm choosing to show some of her unique ruffled scarves here, but she has over TWO HUNDRED items in her etsy shop, so obviously, you will need to head over there and check out her selection. I can only feature 5 or 6.  How do I choose those....well, it's not easy because she has so many really pretty ones!
Valentines Day Red Ruffle Hand Knit Scarf
 
Hand Knit Ruffled Scarf - Turquoise Blue Chartreuse Green
 
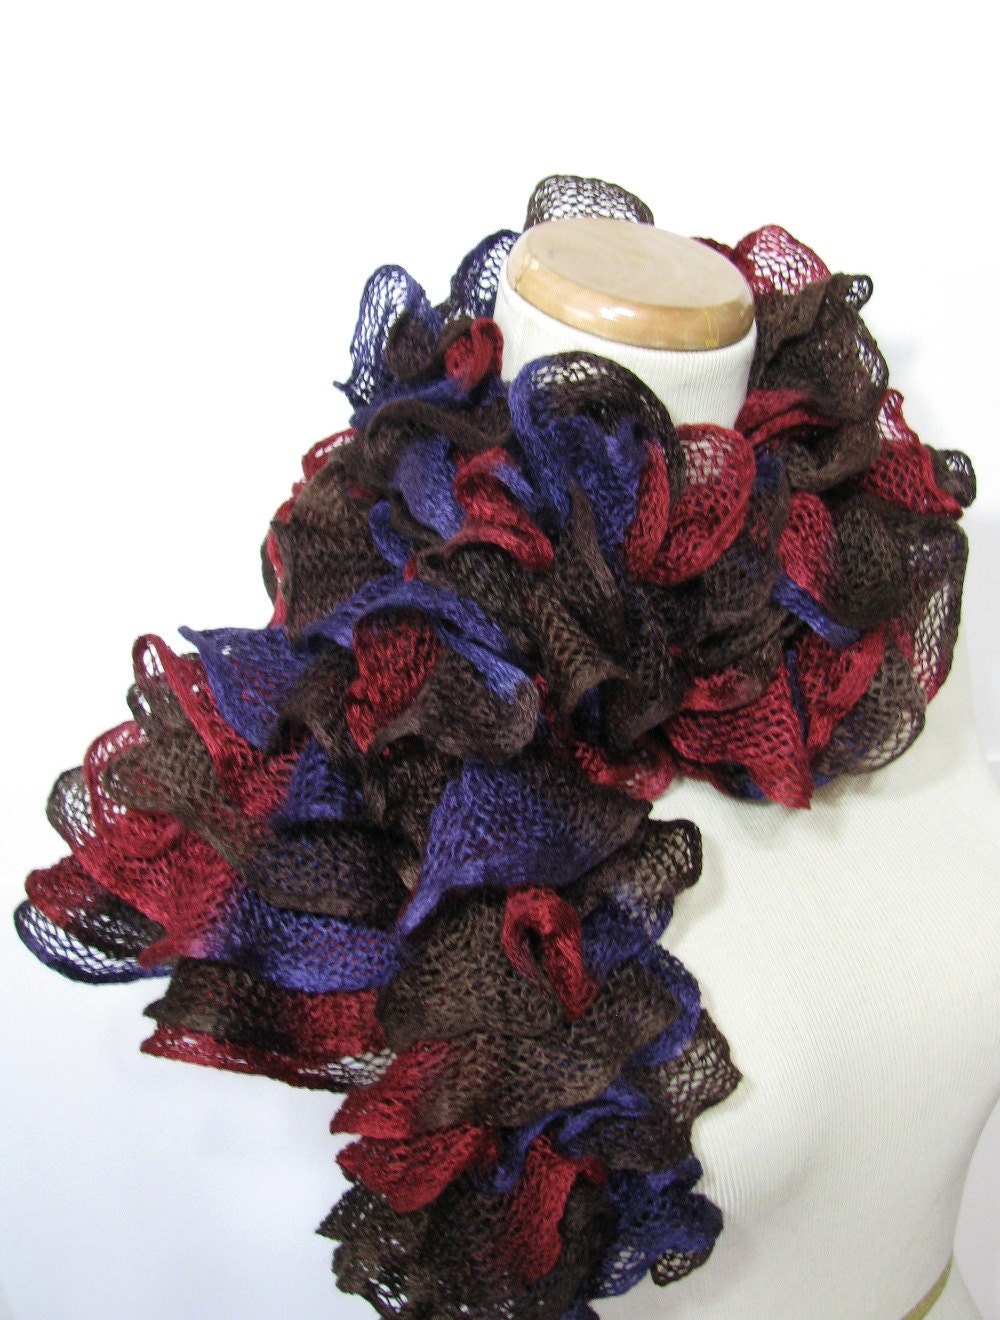
Ruffled Scarf -Red Purple Brown - Hand Knit
 
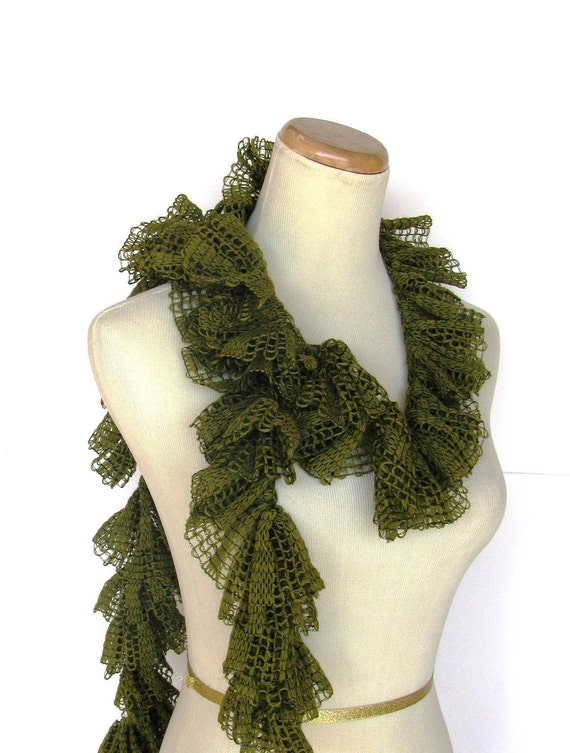
Olive Green Hand Knit Ruffled Scarf -
 
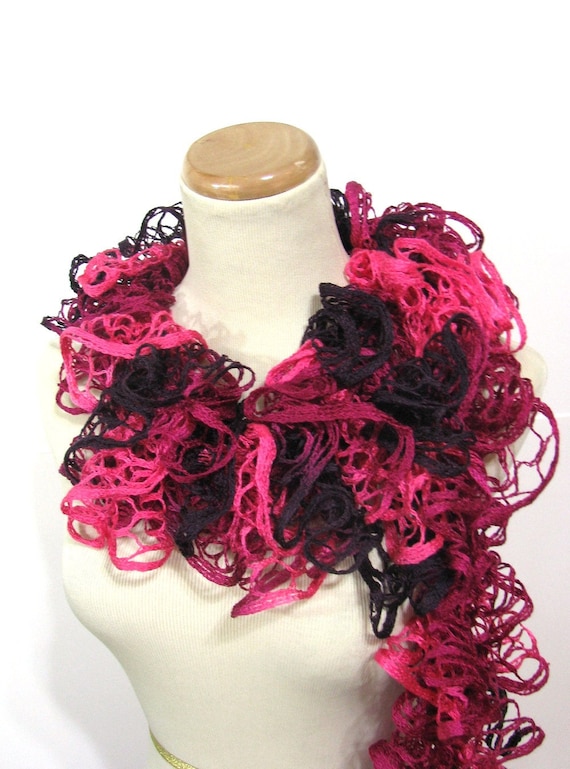
Valentines Day Hand Knit Ruffled Scarf - Pink Hot Pink Purple
 
Brown and Gray Hand Knit Ruffled Scarf

I don't knit or crochet or do anything handy with yarn.  My grandma tried to teach me to crochet many, many times, but it never stuck in my brain.  My friend Marian does beautiful knitting work, and sometime I will show you some of the fabulous stuff she has made.  Today I just want you to enjoy these lovely scarves and hopefully pay Arlene's Boutique a visit.

Have a great weekend!  It's supposed to 'warm up' here on Saturday....
Lisa