Friday, March 29, 2013

Friday Favorite--My Craft Garden

This week sure got away from me quickly!  I've been in the studio working on some brand new ideas that I hope to be able to show you next week.  But for now, it's Friday, and time for a Friday Favorite.

Spring is here.  (Right?)  At least the calendar says so.  Nothing says spring to me like seeing the first flowers of the season pop out in bloom.  Well, that's not happening around here yet, so I went looking for some on etsy.  I have had this shop, My Craft Garden, in my favorites folder forever.  I found them early on when I was putting together a treasury.  Being a polymer clay artist, I was highly impressed.

Now I've done my fair share of miniature work, with lots of tiny details.  I've rolled many an itsy-bitsy rose in my day.  However.  I have NEVER done flowers with the sort of realistic detail that these have.  And they are TINY!  All of these wonderful bouquets and mini gardens are made to dollhouse scale, so that means most of them are maybe an inch high!  Oh my!!  Go have a look around their shop.  I know you will be impressed.

Miniature Polymer Clay Flowers Supplies for Dollhouse
 
 
Daffodil and Daisy Miniature Polymer Clay Flowers Supplies
 
Minigarden, delicate and beautiful, select one from the list
 
Miniature Polymer Clay Flowers Supplies for Dollhouse Iris Daffodils Tulips
 
Miniature Roses Polymer Clay Flowers Supplies for Dollhouse 36 stems
 
Aren't these lovely?  I hope you will go have a look at My Craft Garden.  They have almost 300 items in their shop, all as beautiful as these I've chosen here.
 
I wish you all a very Blessed and Happy Easter!
Lisa


Friday, March 22, 2013

Friday Favorite--The Drifter Leather

SHOES!!  Wonderful SHOES!!  What woman doesn't love shoes?? 

Today's Friday Favorite is something very unique.  At least I've never seen anything like it on etsy until this past week.  HANDMADE SHOES!! Made to order.  Custom fit to your foot!  How cool is THAT?? 

The Drifter Leather is a team of three family members, Callie, Christianna, and their mother Maria.  They are continuing a family tradition of making beautiful shoes from the highest quality materials.  They have a lovely selection of several different styles.  Lots of adorable ballerina flats, some really cute lace-ups, and even boots.  They also make other leather accessories.  The shop is in Greece, so don't count on them to wear this Easter, but oh my gosh they are so cute!  They would be adorable with a pretty spring dress, or even a pair of jeans. 

Here are a few of my favorite pairs. 

Red Alert - Handmade Leather ballet flat shoes - CUSTOM FIT
 
Beige Rose - Handmade  Leather flat shoes - CUSTOM FIT
 
Leather and Lace - Handmade Leather Ballet flats - CUSTOM FIT
 
Chocolate Twist - Handmade Leather Ballet flats - CUSTOM FIT
 
Pink Tea Party - Handmade Leather & Fabric flat shoes -  CUSTOM FIT
 
Aren't these shoes adorable?  I wish I could have every pair!  Go have a look at The Drifter Leather and see all the other cute styles they have available.
 
For the record, I have a TON of shoes.  Far more than any one person needs.  I have actually been trying to purge some of them.  What I love about shoes is that they will always fit....no matter how much chocolate you eat! 
 
Have a wonderful weekend!  It's supposed to snow here.....I thought it was spring??
Lisa


Wednesday, March 20, 2013

Another Trip to My Studio

One of my earliest posts on this blog was a tour of my studio.  Today I'm taking you back there.  There have not been significant changes--at least not ones that you can easily see.  But I have reworked a few of my storage solutions and thought I would share.

I know, it probably looks nearly identical to what I showed you before, but trust me, there have been changes!  Yes, I still have that ratty, cat-clawed chair.  I really need to get a new one....


I have a thing about organization.  I love finding the perfect place to store something.  I love to sort things by color.  I like knowing right where to find something.  That being said, I'm also a very messy worker.  My studio oftentimes looks like a tornado went through it.  I TRY to clean up every day, but that just doesn't happen.  And when I'm in 'crunch time'--the days leading up to a show--all bets are off.  So after a show, when I don't have the pressure to produce, I actually enjoy spending a day or two putting things back in order. 

I've spent some time already this year reorganizing things.  Sometimes you have to live with a chaotic system before you find the right solution.  It helps to work in a space and learn what supplies and tools you want the easiest access to before you make changes.  And those things can vary over time, I've learned. 

Earlier this year I went through nearly all of my supplies AGAIN and sorted and resorted all my wonderful plastic storage drawers.  I also needed to come up with a solution for storing my finished work.  I wanted to have access to it in my studio.  I didn't want it stored in the garage or the basement.  But my studio did not have room for one more piece of furniture to store them.  What to do?

I decided to sacrifice some space on my book shelves.  But I didn't want to just line them all up on the shelves.  That wouldn't look pretty.  I like my bookshelves to look orderly and nicely arranged and interesting.  My solution:  a curtain!

 
I found this simple white curtain at my favorite store, Target.  It wasn't exactly the right length.  It was too short to hang from the top and too long to hang from the second shelf.  I decided too long was better than too short.  I still need to hem it, but for now, I've just got it pinned up.  I hung it simply with a tension rod.
 
 
Pull back the curtain and you can see I've added a couple more shelves so I have plenty of room to store my finished work.  Right now I have a few other random things stored behind the curtain, and I still have one shelf filled with books.  As I need the space I will find new homes for those things. 
 
 
All my little critters are lined up.  It's so much nicer to have access to them, but not have them covering every surface of the studio.  This system works....for now.....you never know with me when I am going to switch things up again in the studio!
 
 
Now that the studio is back in order, it's time to mess it up again!  LOL!! 
I would love to hear about your work spaces.  I'm always intrigued by how other artists work.
 
Lisa
 
OK---I'm NOT PROUD of this picture, but thought I would show it anyway.  This is what my studio looked like after the holiday season was over.  I KNOW!!  How does one function in such chaos?!  This is definitely at its worst.  Most days you will find it at some level between pristine and this:
 
 
(I'm so glad my mother doesn't read my blog....)


Friday, March 15, 2013

Friday Favorite--Dianne's Baskets

As I was trying to decide what shop to feature today on Friday Favorites, I tried to think of something different than I have shown you before. Since Easter is just around the corner I wanted to feature a shop relevant to the upcoming holiday.  I searched first for chenille bunny, and didn't find anything that immediately spoke to me.  Then I thought, "How about a BASKET?"  Duh!!  An EASTER BASKET!!  There has got to be a nice shop on etsy that sells beautiful handmade baskets, right?  RIGHT!  Dianne's Baskets!

I know people joke about taking 'basket weaving' for an easy college credit, but those are the people who have NOT done basket weaving!  It is NOT a simple little granny craft!  It takes talent, and skill, and precision to make a beautiful, well-made basket, and Dianne shows that she has all of the above. She has an extensive collection of baskets in her shop, from purely utilitarian to wonderful works of art.  She weaves each basket by hand in her Wisconsin studio, from the finest quality materials available.  I hope you will take the time to go have a look around her etsy shop

Here are a few of my favorites:

Hand Woven Round Bowl-Type Basket, Easter Basket, Double Wall, Paster Colors
 
Hand Woven Round Easter Basket with Colorful Accent Weaving and a Wood Swing Handle
 
Large, Round Quatrefoil Basket, Hand Woven, Pink, Teal, Burgundy, Cathead Shape
 
Little Bucket Basket with Wire Handle, Red Accents, Hand Woven with Wood and Wire Swing Handle
 
Hand Woven Egg Basket with Twisted Reed Handle, Pink with a bit of Tan and Purples
 
Carolina Charm Basket - with Decorative Braided Handle, Hand Woven
 
Wouldn't any of these be lovely filled with Easter treats?  I hope you have enjoyed this little taste of Dianne's Baskets and that you will go have a look around her etsy shop.
 
Have a wonderful weekend!
Lisa


Wednesday, March 13, 2013

Who Doesn't Love Chocolate?

A couple years ago, when I began making these new whimsical bigger pieces, I started with a batch of Easter bunnies.  I wanted to make a dozen to have for a spring show.  As I was making yet another white rabbit, I thought, why not make a chocolate bunny?  Everyone loves a chocolate bunny!  Now, two years later, I'm still making versions of my chocolate bunnies.  They always seem to bring a smile to anyone who sees one.  This is my favorite chocolate bunny from this year's collection:


I sculpted this bunny using Premo polymer clay. This clay has a soft sheen to it that helps with the illusion that this is a chocolate bunny. He looks good enough to eat, but don't bite his ear off! 
 
 
He has a frilly sky blue crepe paper collar and two little pink and yellow clay flowers down his belly.  He is holding a striped clay Easter egg that matches his outfit. 
 
Easter will be here in about two weeks.  Are you ready? 
 
Happy Day!
Lisa  


Tuesday, March 12, 2013

Easter Eggs

I wanted to come up with some unique Easter figurines that were not bunnies.  Or chicks.  Or ducks.  Something clever.  Different.  Then it hit me.  Why not EGGS? 

"Eggbert" came to mind.  I could call him Eggbert!  Silly, I know, but what's life without a little whimsy?  I'm going to show you three of my eggs here today.

 
This Eggbert has been on the Easter Egg hunt.  He's got a basket filled with a half-dozen pastel eggs.  He wanted to dress up for the occasion, so he's wearing his bunny ears headband, made from wool felt and a white chenille stem. 
 
 
You can find Eggbert here, on my Pfatt Marketplace page this month, along with a couple of bunnies. (Yes, I remembered to get it posted on time this month.  If you remember from this post, I totally forgot to send my listings in last month!)
 
 
I had these cute cupcake picks in my stash of stuff and thought it would be cute to make an Eggbert holding one of these as a sign.  I sculpted the egg to match the colors in the greeting, and then added a cute paper party hat trimmed with pink chenille. 
 
 
Happy Easter Eggbert is available here, in my etsy shop. 
 
 
This is Eggbert's little sister, Eggberta.  She is a pale yellow egg with white polka dots.  All dressed up for spring, she's wearing an adorable pair of grey Mary Jane's with Swarovski crystals, and a darling 'straw' hat made from twisted coils of clay and trimmed with a blue dotted ribbon and a little yellow flower.
 
 
Eggberta is also available in my etsy shop.  You can find her listing here.
 
I had a lot of fun creating this whimsical little eggs.  I hope you enjoy them!
 
Spring is coming!!  Only this time of year can you have 8 inches of snow on the ground AND have tulip bulbs starting to peek out of the earth! 
 
Have a great day!
Lisa


Thursday, March 7, 2013

A Creative Challenge---The Final Project

If you've been reading the last few posts, you know that my friend Marian and I have an ongoing creative challenge.  Each year at Christmas we exchange a 'kit' of five random craft supplies and challenge each other to come up with a project using those supplies and up to three more.  You can see the full rules in this post.

Yesterday Marian showed you her project using the kit I put together.  Today it is my turn.

To recap, my kit contained these supplies:
  1. a block of black Premo polymer clay
  2. a few black and a few off-white chenille stems
  3. two types of black and off-white ribbon
  4. a collection of black and off-white printed papers
  5. coordinating cardboard buttons
 
I didn't have a predetermined idea as to what I planned to make with my kit.  My first thought was to do some sort of handmade book, but as I mulled it over, my 'day job' kept creeping in to my brain, and I decided I was going to make some sort of doll.
 
Instead of making it exactly how I normally do, I thought I would use some alternative materials to construct the body.  So I started with an oval-shaped paper mache box to use for the body.  I covered the box with the paper.  I planned to use the chenille stems for the arms and legs, but realized quickly that the doll would never stand on those legs, so I made legs with wire and covered them with the black clay.  Then I attached them to the box with more wire.  I was able to use the off white chenille for arms.
 
 
We are allowed to add more of any given supply, so I was able to make a head using flesh-toned clay.  It is also attached with wire.  I used curly wool roving for her hair, made a hat using the cardboard button and some coiled up chenille.  I made a little purse using more of the buttons and a little flower that is off a vintage earring.
 
When I attached the head I left a loop to hang a group of three little charms.  I tied one of the ribbons around her neck and added more chenille to trim her arms and legs.
 

One of the papers, as you can see, is a sheet of text.  I searched through the text to find words that would make a new sentence.  I glued these onto the base (which is the lid to the box.  It also has clay inside it to help keep the piece stable.)


The buttons on the shoes are actually the holes that punched out of the centers of the buttons!  I don't like to let anything go to waste!
 
I had a lot of fun with this project.  It was my regular work, but with a twist.  Perhaps I didn't work too far outside my comfort zone, but I'm really happy with the result nonetheless.
 
Have you been inspired by our kit projects?  They really are fun!  You should try it with one of your friends!
 
We'd love to hear from you!  Please leave your comments below!
 
Lisa
 
PS--I've got a big show coming up this weekend, so I'm not going to be posting a Friday Favorite this week!  So, have a great weekend everyone!
 
Oh, if you happen to live in the Omaha area, my show is in Council Bluffs at the Mid-America Center.  I'd love it if you stopped by!


Wednesday, March 6, 2013

A Creative Challenge--Lisa's Kit

Hi everyone!  Last week Marian and I shared our kit challenge projects with you.  This week, as promised, we are sharing the second half of the challenge...the projects made with the kit I assembled.

To recap the rules:  we each put together a kit of five random craft supplies.  We can add up to three more supplies (with a few freebies) to create our project.  To read more about the rules and our projects from Marian's kit, click here for my project and here for Marian's.

So now, here is Marian.....

Marian Making Lisa's Kit

Good Morning A Piece of Lisa fans! Lisa has given me the keys to her blog once again. I promise she'll be back tomorrow.

Today I'm sharing with you what I made from the kit Lisa assembled. It contained:
1. a package of black Premo polymer clay
2. a few black and off-white chenille stems
3. some black and off-white cardboard buttons
4. two black and off-white ribbons
5. a few small sized decorative papers in the same colors


Okay Lisa fans....and all you clay artists...I AM NOT ONE!  On one of her visits Lisa and I made dolls and we used polymer clay to make the heads.  That is the only experience I've ever had with polymer clay. To be fair, she mentioned that she added it to her kit to challenge me. I do LOVE a challenge. I'm not promising results.

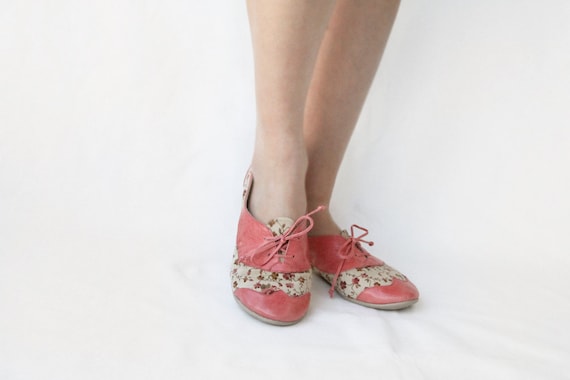
I had no clue what to make. I had the flu twice in January. During the end of the second bout I spent a fair amount of time online looking for a pair of shoes to wear to Lisa's niece's wedding next summer. I had shoes on my feverish brain, which led to the inspiration for the kit. That shouldn't be too hard, right? WRONG! Clay is so difficult to manipulate. It was obvious fairly quickly that I am NOT gifted at the craft!

I have a damaged wrist, so conditioning the clay was difficult.  I used a hairdryer to soften the clay a bit, conditioned it as best as I could, and fashioned a high heel. I filled the cavities with rumpled foil to prevent it from caving in.  (Lisa had taught me that when making doll heads.) I used a nail in the heel to insure it wouldn't sag. Oh boy, if I were younger I would be too embarrassed to show you my result! Simply horrid workmanship.


I used the paper as an insole. I embellished the shoe with the cardboard buttons and ribbon. I intended to wrap the pipe cleaner around the shoe's sole but that was bulky and ugly. I tried to use it with the embellishment, but again it didn't work. It had to be used so I grabbed a small white box, put the shoe in some silver tissue paper and latched the pipe cleaners around it as a 'ribbon' for the box.  Necessity is the mother of invention! Then I took a jumbo Xanex....TEASING....and called it finished.


All you clay artists are surely shaking your heads, and I don't blame you one bit! On the other hand I did it and that always makes me happy. I liked my intention, which counts for something, right??! It was hard and frustrating and fun. My oldest son did a fired clay project in grade school and we're still all fighting over whether it's an anteater or an elephant...so I called this good. At least you know it's a shoe. :)


Oh, and one more thing. I've admired Lisa's work since the day we met and became instant BFFs, but NEVER more than now!! I take my hat off to her and her extraordinary talent and all of you who work with polymer clay. You are all artists I admire to the max! It's so much harder than it looks and your talents are amazing!

***********************************************************************
 
Thanks, Marian, for sharing your project!  You are a really great sport, and take the challenge for what it is....a way to work with things you might not work with normally.  Well done! 
 
Tomorrow I will share my project using the same kit.  We would really love to hear your feedback on our kits!  We have so much fun with them, and we think EVERYONE should do something like this with a creative friend!
 
Until tomorrow,
Lisa

Tuesday, March 5, 2013

Daisy

I want to introduce you to my new favorite bunny, Daisy.  I LOVE HER SO MUCH!!  I know, I say that about a lot of my figurines, but she has a special place in my heart.  You see, daisies are my favorite flower.  I think they are the friendliest flower, so light and cheerful.  (David says they are just weeds!)  I even have a dog named Daisy!  So, yes, I'm partial to this pretty little bunny.

 
Daisy is wearing a bright yellow polka dot dress with a pretty white eyelet skirt and a crepe paper collar.  She has a matching satin ribbon on her big, delicate ears. 
 
 
She is carrying a pretty little basket full of daisies.  (Daisies are her favorite flower, too!) 
 
 
I've had a lot of fun the last couple weeks creating fresh, spring bunnies for Easter.  I can't wait to show you some more! 
 
Back to work!  Big show coming up this weekend!
Lisa
 
PS--One more thing!  I just realized this is my 100th blog post!  YAY!!


Friday, March 1, 2013

Friday Favorite--Eried Handmade Jewelry

Wow!  It's Friday already!  Where did the week go? 

So, of course, since it's Friday, it's time for another favorite etsy shop.  I have my friend Marian to thank for this week's favorite.  She discovered Eried last week and sent me the link.  I'm so glad that she did, and I'm sure you will understand why. 

Eri is from Athens, Greece.  She is an architect professionally, and has come to the jewelry-making business in recent years.  Her work is stunning.  You can see her architectural training in her elegant design style.  She makes the most beautiful, delicate beads from polymer clay, and combines those with lovely precious stones and silver.  Her jewelry pieces are wonderful little sculptures you can wear.  I am so excited to share her work with you here today!

In Eri's words, "Flowers are born out of stone."

modern romantic flower necklace - minimal avant garde jewellry - nO.196 ''calla lilies between amethyst''
 
contemporary geometrical polymer clay necklace nO. 218 ''two lonely dots between black onyx''
two lonely dots between black onyx

minimal chic necklace 'nO 27 red flower petals between white corals''
red flower petals between white coral

nO. 175 'water lilies around your neck' necklace
water lilies around your neck

nO. 176 ' tulips around your neck' necklace
tulips around your neck
 
Don't you agree that Eri's work is amazingly beautiful?  So simple, so elegant, so lovely!  Please go check out her shop, Eried.
 
Happy Friday!
Lisa