Wednesday, October 31, 2012

One Last Spook

Since today is Halloween I thought I would celebrate by showing you one last spook from my 2012 Halloween collection.  This one is perhaps my favorite.  OK.  I know.  I say that alot.  She's at least in my top ten.  I LOVE HER!

Meet Jackie Sparkle:


My pumpkin head witches were popular this year.  I made several versions of this one:
 
 
They were never exactly alike, of course, but they were similar---dressed in striped stockings and a black tulle dress.  One day when I was making one, I thought, why not change it up a bit?  And Jackie Sparkle was born.
 
 
I dressed her in an orange body suit with black polka dots.  Her skirt is made from dozens of pieces of orange glittered tulle.  I used black crepe paper for her collar.  Her hat is made from paper covered in black velvet and trimmed with a little strip of tulle to match her skirt.  To add a bit more sparkle, I covered her boots in black glitter and trimmed them with chenille.  She is carrying a baton with a black glittered cat head on the end. 
 
 
Jackie Sparkle is off to a Halloween party tonight.   I think she will be the Belle of the Ball, don't you?
 
It's been fun sharing my whimsical Halloween characters with you. I hope you have enjoyed them.  To see more of my work, visit my etsy shop or my Pfatt Marketplace page. 
 
Have a safe and fun and HAPPY HALLOWEEN!
Don't let the goblins get ya!
Lisa


Friday, October 26, 2012

Friday Favorite--Creative Chics Aprons

Wow!  It's Friday again already!  Time for another Favorite.  Let's go to Creative Chics Aprons and have some fun!

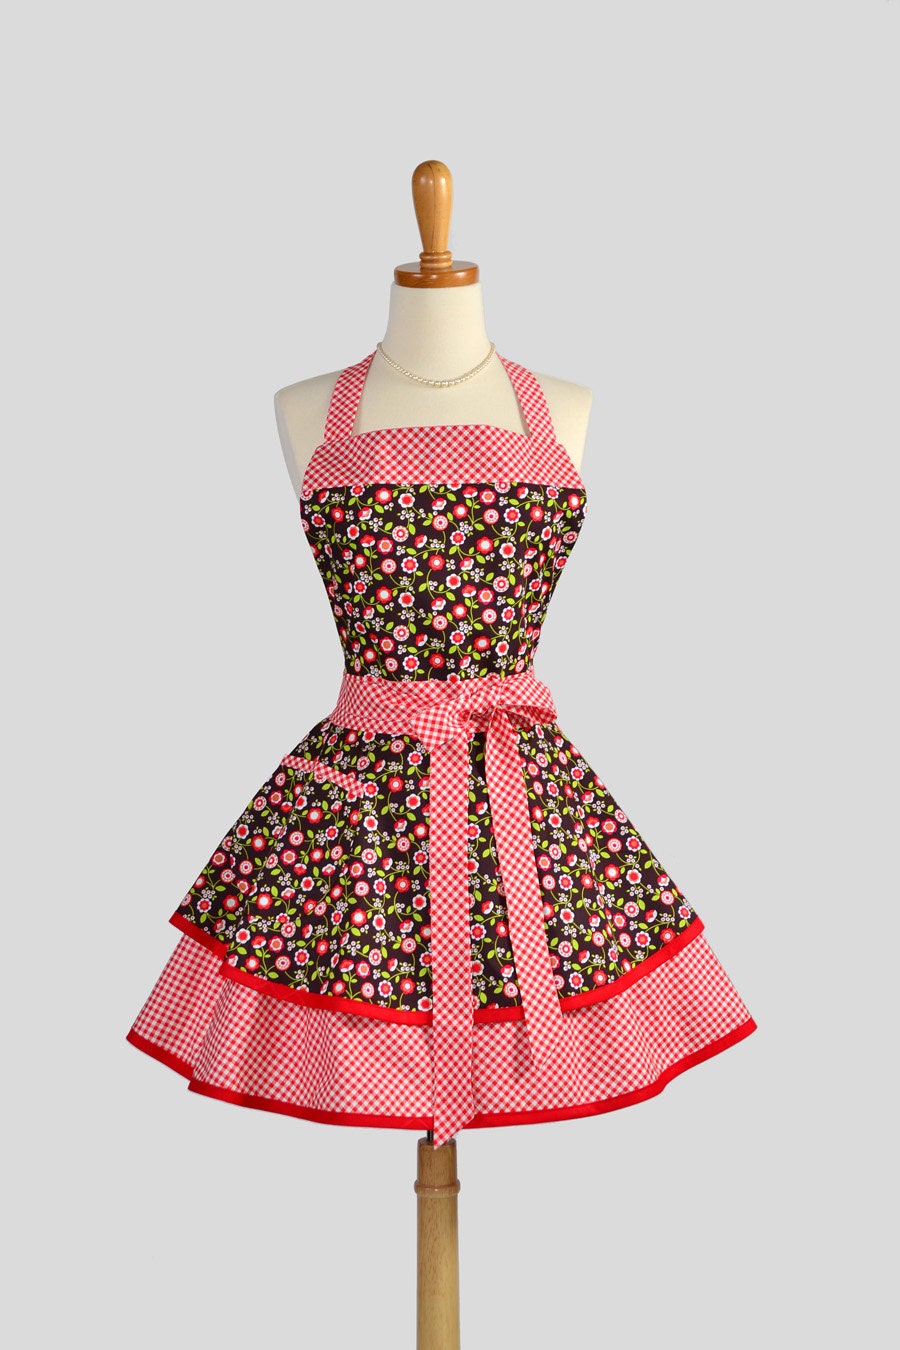
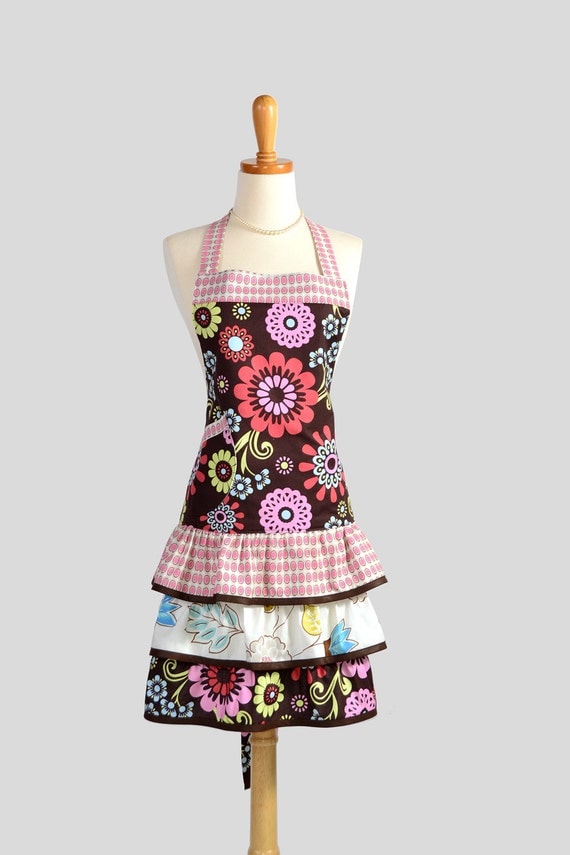
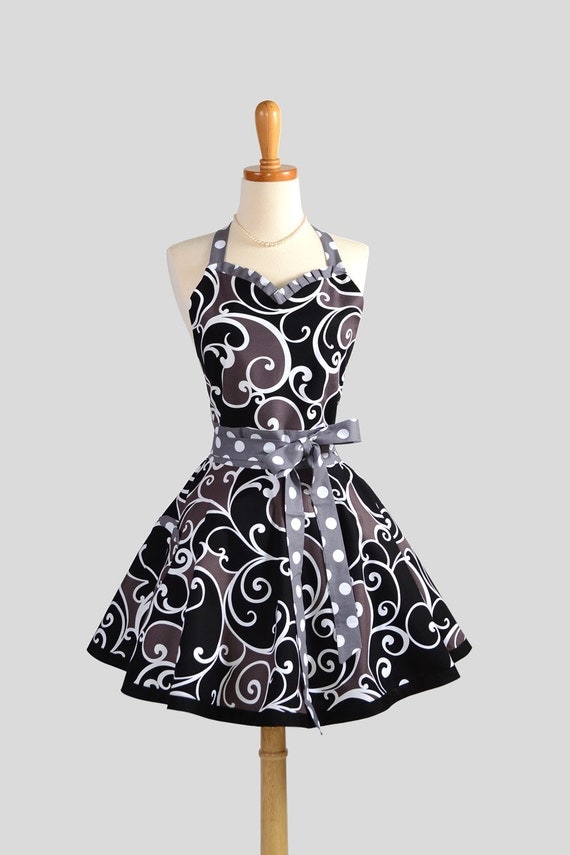
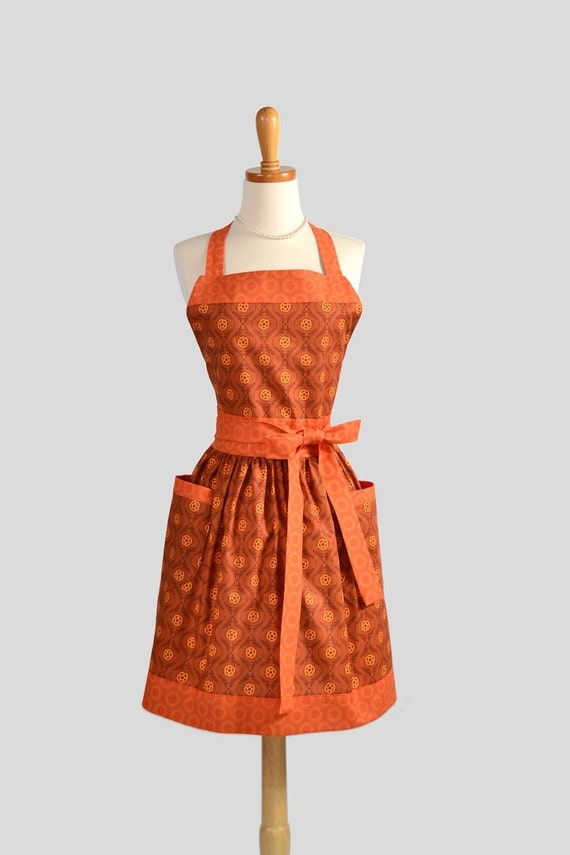
I don't wear aprons.  Perhaps I should, because I tend to be a messy cook.  But if I did wear aprons, the first stop on my shopping trip would be Creative Chics.  This group of five women from Kansas City, Kansas, have a dizzying array of adorable aprons available.  Each one is a modern take on a vintage style.  Each one is fun and fabulous.  Choosing five or six for this post was nearly impossible, because they have many styles and SO MANY CHOICES!  You can tell that these women are serious fabric junkies (I mean that in the very nicest, best way!)

So, here goes. 

Ruffled Retro Apron - Cute Womens Apron in Country Fall Floral with Flirty Gingham Handmade Full Kitchen Apron
 
Ruffled Retro Apron . Flirty Full Womens Apron in Large Geometric Floral Designs on Brown With Dots Trim
 
Sweetheart Retro Apron , Sexy Kitchen Apron in Michael Miller Surf Collection Grey Black and White
 
Womens Bib Full Apron . Full Kitchen Apron Handmade in Fall Colors of Riley Blakes  Brown and Orange Perfect for Monogram or Personalization
 
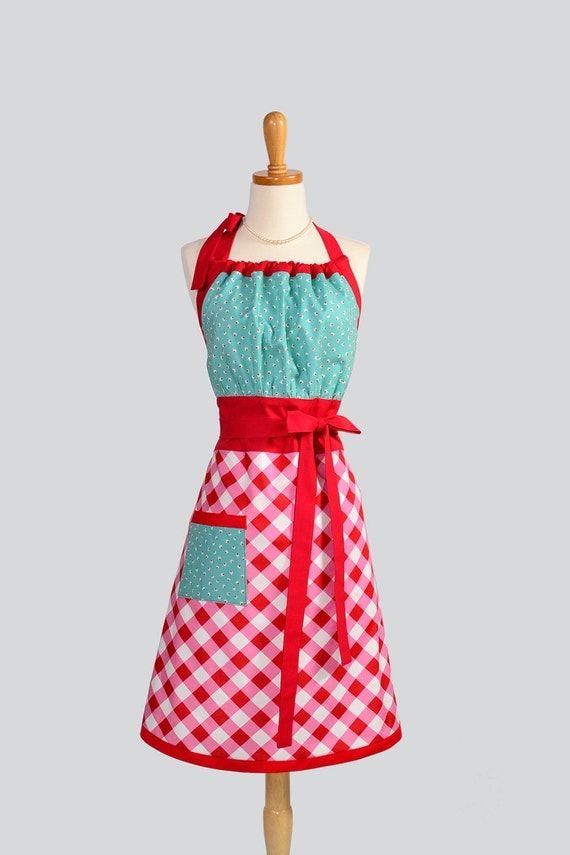
Cute Kitsch Retro Apron / Handmade Full Retro Womens Apron in Red Gingham and Turquoise Bodice
 
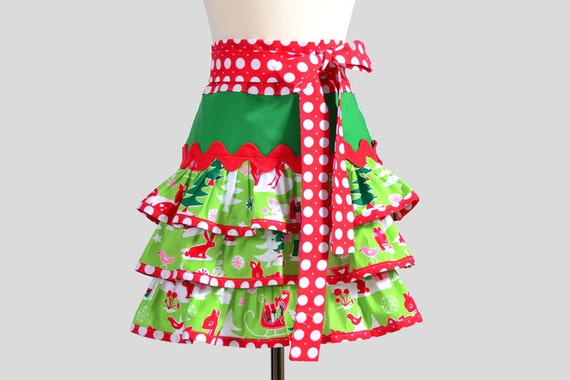
Christmas Apron . Cute Retro Womens Half Apron With Ruffles is One Of A Kind Handmade Holiday Apron
 
Aren't these wonderful?  I love them!  Are you like me and don't wear aprons?  Well, I think they would look fantastic just hanging in your kitchen as well!  I hope you'll go have a look at all of Creative Chics fun, retro aprons. 
 
Have a fun weekend!
Lisa
 
OK....just one more....


Retro Full Kitchen Apron / Womens Apron for Christmas and all Year Thru in Red Floral Bonnie and Camille Moda Fabric


Tuesday, October 23, 2012

Paper Pleasures--A Halloween Treat

 
Halloween is just over a week away.  Do you have a few special goblins that deserve a nice treat?  This project is fun and pretty easy, and makes an ordinary Hershey's chocolate bar a bit more fun.


Aren't these cute?  Here's how to make one:
 
You will need the following supplies:
Two coordinating printed papers of your choice
Some scraps of solid colored cardstock for the tags
Three ribbons that match your paper
A regular size Hershey bar (or Nestle Crunch, or Mr. Goodbar, etc.)
A sentiment stamp of your choice
Ink
Adhesive (I prefer 3M's Glue-Dot runner, but glue stick, double-sided tape, or tape runners all work equally as well)
Knife and/or paper trimmer
1/4" hole punch


Assembly:
Cut one sheet of paper to 5-3/8" x 6"
Cut your focal point paper to 4" x 6"
(Note: if using 8-1/2 x 11 paper, cut to 5-1/2" instead of 6"--it will work fine and make the best use of your paper.)
Glue the smaller sheet to the bigger sheet.
Wrap around the Hershey bar and secure with adhesive.
Stamp your sentiment on cardstock and trim.  If desired, mat with a second color and trim again.  Punch a hole with a 1/4" hole punch.
Cut your ribbons to about 13" long. (I use three different widths of ribbon, but you can use whatever you have.)
Stack the ribbons, tie the first half of a double knot using all three, then finish the knot using only the bottom ribbon. 
Thread your tag on the remaining two ribbons and tie a double knot. 
Trim ribbons if necessary.
 
This is a fun and easy project and these adorable candy bars would be great treats for special neighbor children, your child's teachers, your grandkids or even your co-workers. 
 
Happy Halloween!
Lisa


Friday, October 19, 2012

Friday Favorite--Sunday Drive Studio

Today we're headed off to Sunday Drive Studio and the work of Amy Jung. 

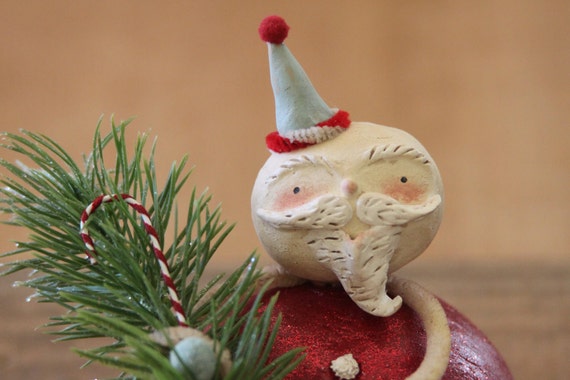
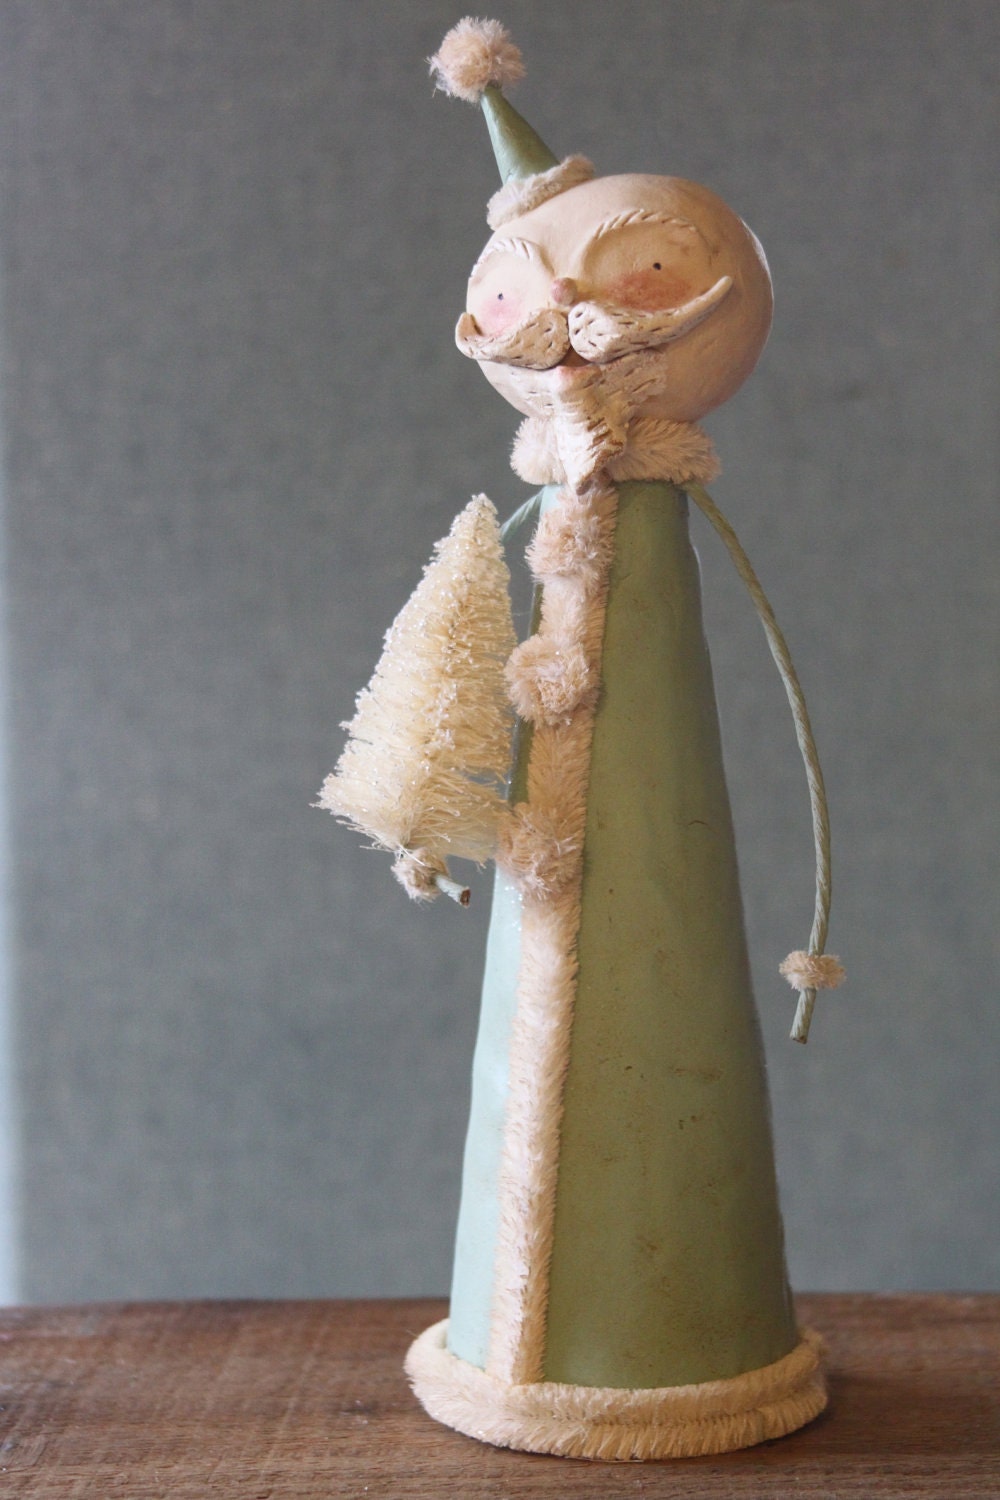
I'm always intrigued by the work of other artists who use clay to create whimsical folk art sculptures.  Amy uses paperclay to sculpt delightful, vintage inspired holiday decorations. I think her work has wonderful personality and I'm pleased to share it with you here.

A few of my favorites from her etsy shop:

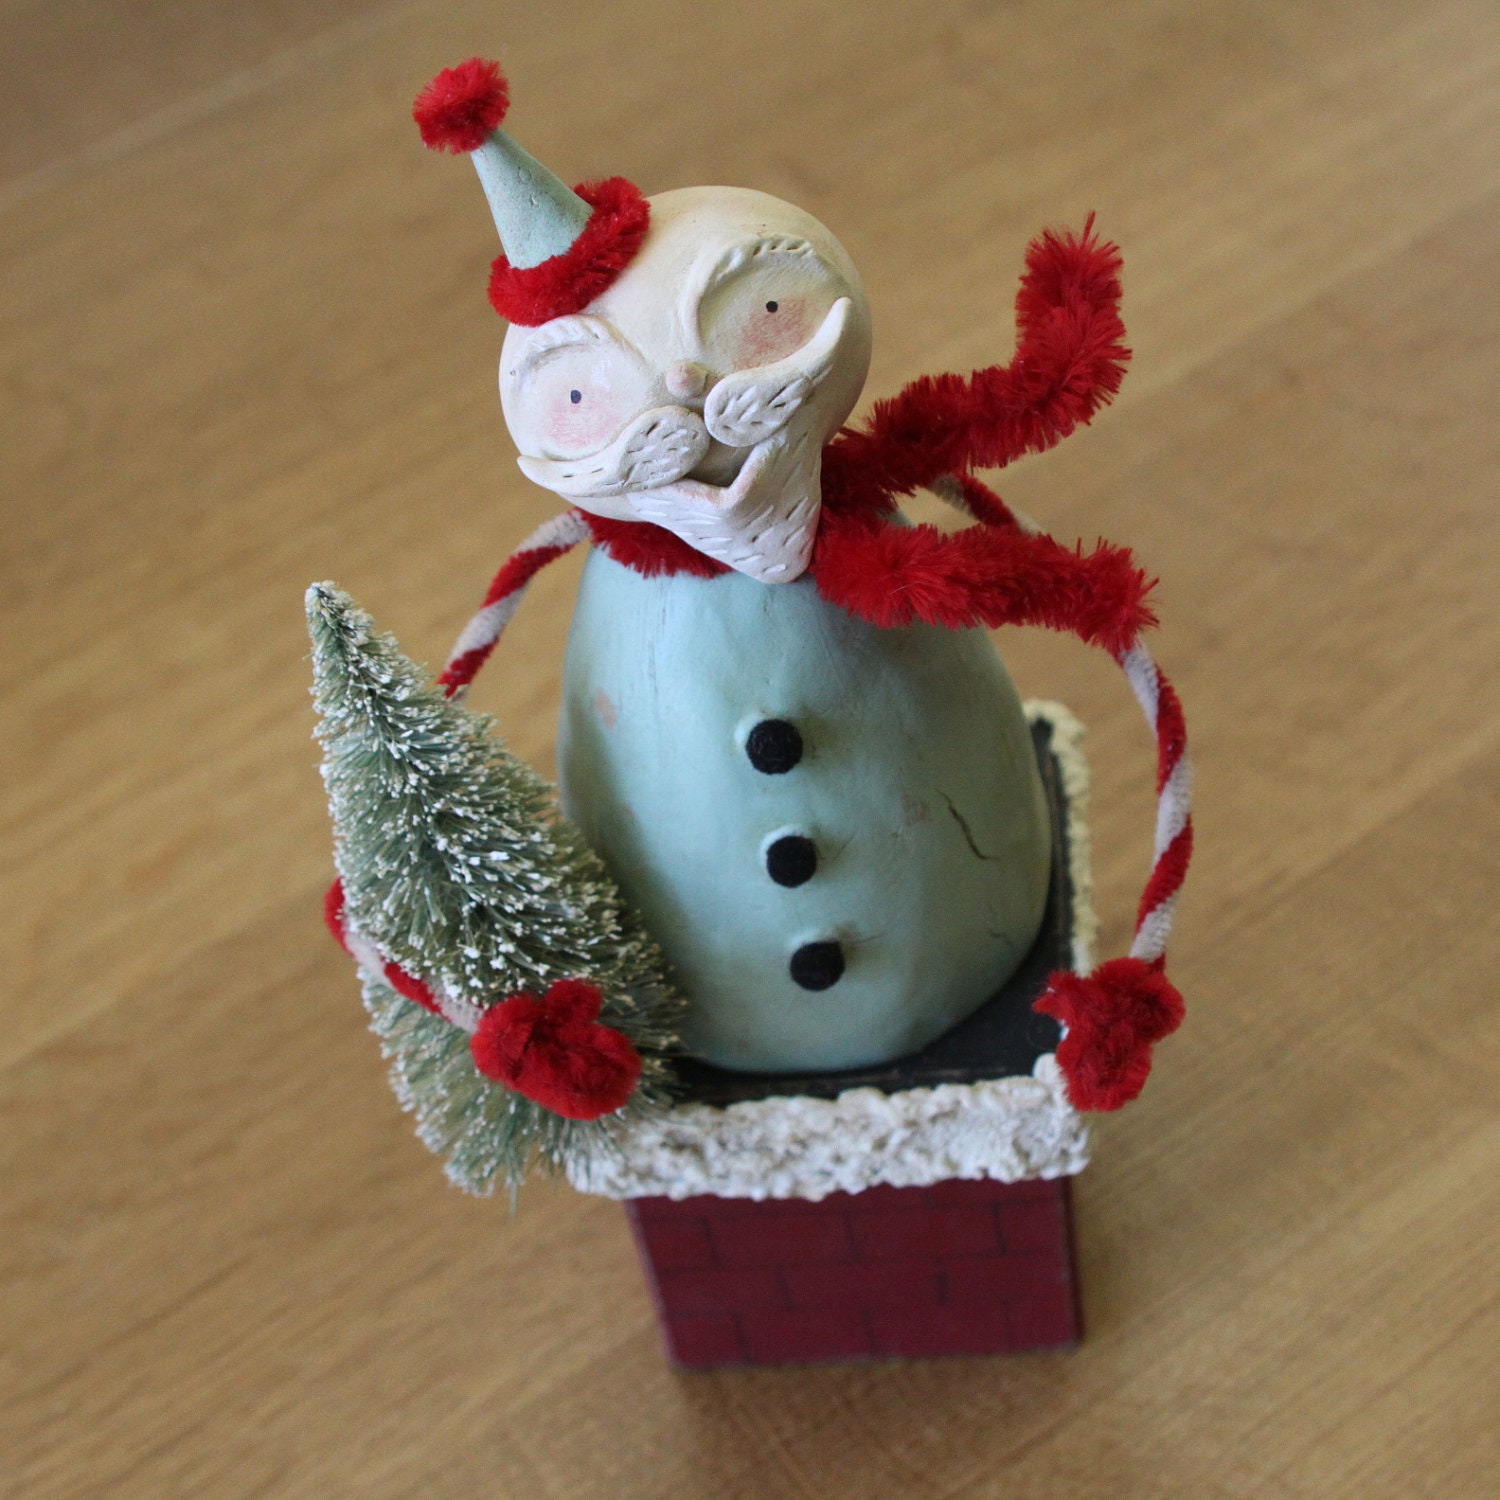
Santa Christmas Folk Art Santa Claus Decoration
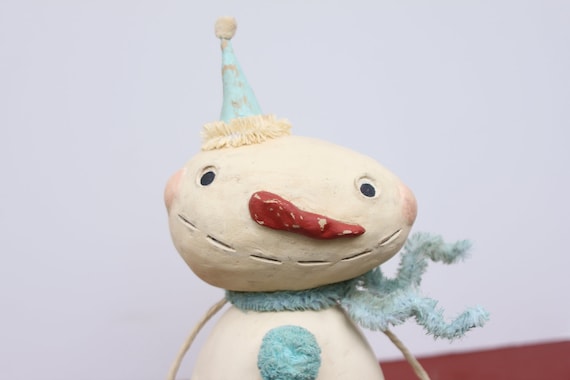
Snowman Christmas Folk Art Primitive Holiday Decoration Shabby Chic Blue
Snowman Christmas Folk Art Holiday Decoration
 
Santa Christmas Folk Art Roly Poly Santa Claus Decoration
Santa Christmas Folk Art Santa Claus Decoration
The Christmas holidays are quickly approaching...really, they are!  I thought I would share these adorable vintage style Christmas pieces from Sunday Drive Studio, but Halloween pieces are still available as well. 
 
I hope you enjoy Amy's work.  If you have a favorite etsy artist, let me know who they are.  They just might become one of my future Friday Favorites!
 
Enjoy your weekend! 
Lisa


Wednesday, October 17, 2012

Creating a Space

I've been absent for a few days, yes, I know.  I was so busy getting ready for that BIG show I did over the weekend, and then I took a couple well-deserved days off.  (To learn what I did yesterday, check out this blog.)

Today I thought I would share with you what it takes to set up a display at an art and craft show.  It takes a lot of time and effort to create a compelling display.  I think how you display your work at a show is VITAL.  I don't believe in just setting things out on a table and calling it good.  I think you need to create an environment that suits your particular art or craft.  Something that will draw a shopper INTO your booth.  Believe me, you only have SECONDS to make an impression on a shopper before they move on to the next booth, and every advantage you can give yourself is worth the time it takes. 

My displays have gone through many transformations throughout the years, evolving with my work.  This summer I spent countless hours sketching out plans, choosing fabric, cutting it to size, painting crates.  I spent A WEEK piddling with how it would be set up---working out the kinks on how to light it, how to create the backdrop, how to stack the crates in the best way.  All of that in my living room.  What a mess!  But oh, so worth it!

So here is a bit of a 'time-lapse' on setting up a show.  Some of the pictures are not the best, but you'll get the idea.  Much thanks to my husband, David, for helping out at this one. 

We'll start here.  In the garage.  This is my trusted Chevy Tahoe, loaded almost to the gills.  This is actually a 'lite' load compared to what it has seen in the past. 
 
Arriving at the venue I am greeted with this....a blank block of space on the floor with a heavy duty extension cord.  I had a little bump out in my wall, with some 'bonus' space I didn't expect to have and in the end I was unable to utilize because of how my display sets up.  Oh, well.  It all worked out fine.
 
Tables and backdrop panels, and supports for the panels.
 
Crates and boxes and tubs, OH MY!
 
All the stuff it takes to make a show.
 
We're getting there....tables set up (with risers under the legs to lift them to 33 inches), fabric skirting to the floor so you can't see all the ugliness beneath them, backdrops in place, lights hooked up (lighting is KEY to a great display!), crates stacked and ready to be filled. 
 
Another angle of the empty crates.  I love how they look---I'm so glad I chose to paint them white.  And the dotted fabric is fun and whimsical, just like my work!  Now the fun can begin....setting out all the pieces and choosing just the right spot for each one!
 
It's hard to get a good panoramic angle. 
 
A view of the long display, eight feet, across the back.  Looking great!!
 
The limited edition ornaments displayed on a screen on the front table.
 
Another overall view.  I'm really happy with how it turned out, although there are a few things that will need tweaking for upcoming shows. One thing missing is a sign.  I need a sign announcing my business.  I couldn't come up with a good one in time.  It's always a learning process.
 
Some of you have probably done a craft show or two in your day.  Many of you probably have not.  I thought I would just give you a peak at what goes on to create a successful show display.  It's not all fun and games and easy.  It takes a lot of thought and planning, careful packing and loading, and a great deal of time. 
 
We arrived at the venue at 3:40pm and began unloading nearly right away.  It took 5 trips back and forth, through the parking lot, across a loading driveway, through one large room and into the lobby where my space was located.  At 7:30pm, we left the building.  Nearly 4 hours to set up a show.  But it was worth it.  The booth looked GREAT and the show was a success!
 
 
Now, it's time to get back to work! Another show this Saturday!
Thanks for dropping by!
Please leave your comments below.  I LOVE getting comments!!
Lisa


Friday, October 12, 2012

Friday Favorite--Leuckit

I am forever fascinated by people's creativity.  Especially when an artist takes everyday items and what seems to be 'junk' and turns them into something wonderful.  Case in point:  Leuckit.

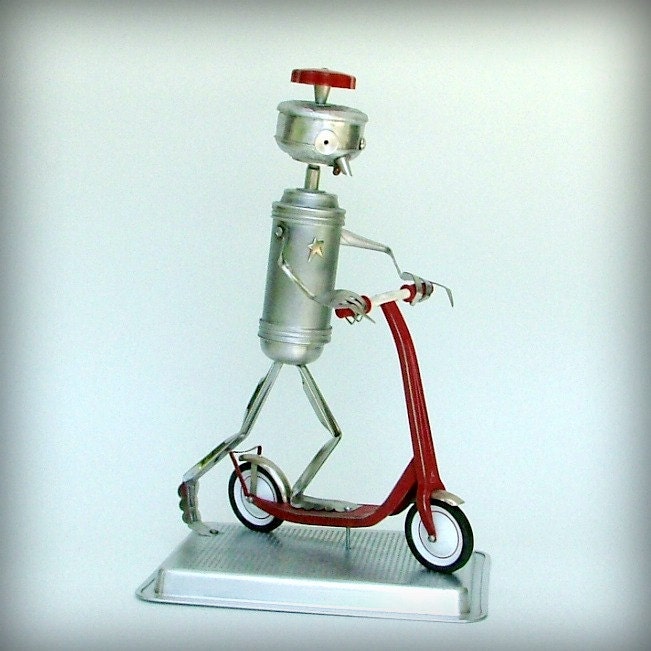
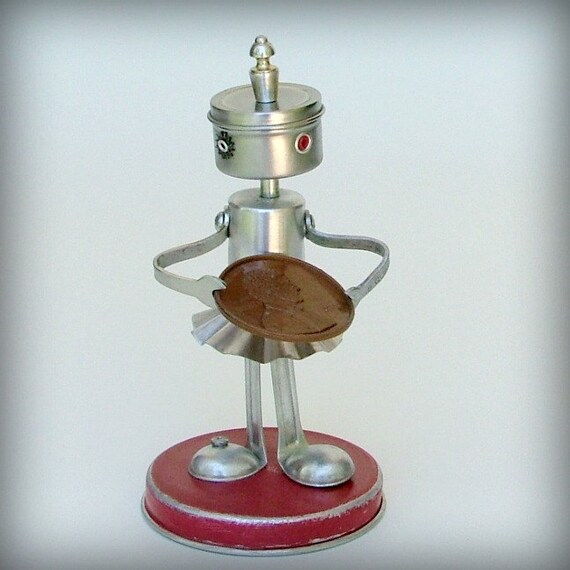
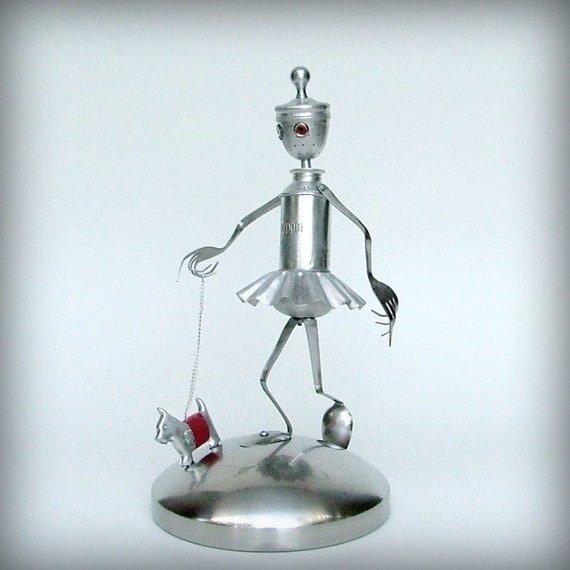
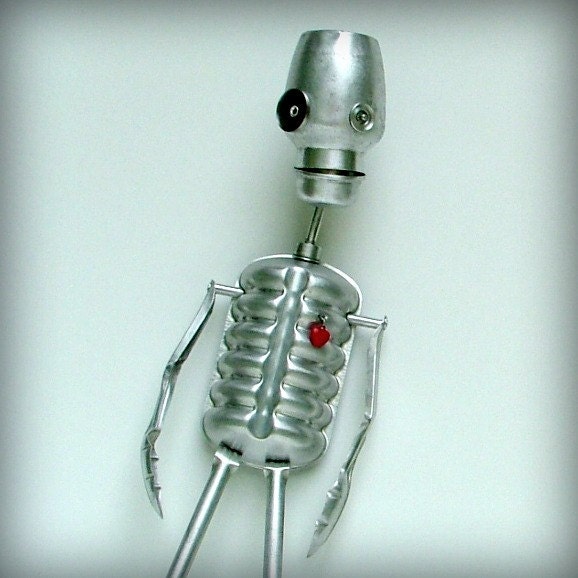
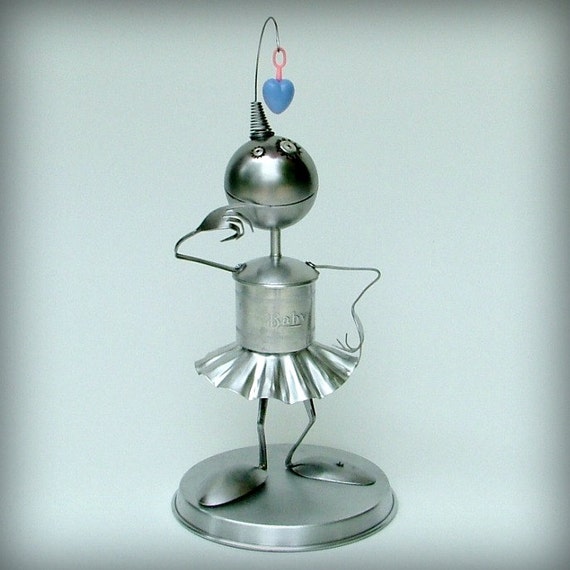
Donna Provo Leuck uses kitchen utensils, old flashlights, candy molds, tin boxes--whatever she can find--and turns these common objects into clever sculptures.  It's recycling at its best---or upcycling, if you prefer.  I think her sculptures are fun and whimsical, and I'm pleased to share them with you today.  I've chosen five of my favorites to showcase here, but I hope you will check out her shop to see the rest of her clever creations.

Baby Stole My Heart - robot - art assemblage - kitchen robots
 
Wanna Race - robot sculpture - recycled art - ooak
 
A Penny for Your Thoughts - Robot Art Assemblage - kitchen robot
 
Walking the Dog-robot art sculpture-ooak kitchen robot
 
And in the spirit of Halloween:
 
Skeleton - Robot Skeleton - recycled art assemblage
 
 
Now head on over to Leuckit and check out the rest of Donna's robots.  Be sure to read her profile as well.  Her story is inspiring!
 
Have a great weekend!
Lisa
 
PS--I'm exhibiting at the Mid-America Center in Council Bluffs, Iowa, this weekend.  If you are in the Omaha/Council Bluffs area, stop in and say HI!  It's a great show, with lots of wonderful artists and craftspeople.  


Thursday, October 11, 2012

PFATT Marketplace

One summer Sunday afternoon I was browsing around online, looking at artists' blogs and websites.  From one I followed a link to PFATT (Primitive Folk Art, Trinkets, and Treasures) Marketplace, and then spent the rest of the afternoon looking at all the wonderful artists that are featured there. I was impressed with the quality of the work represented, and I wondered how it worked.  How do you set up a page?  How are the artists selected?  What are the fees, if any? I sent an email to find out more about it.

A few weeks later, I received a reply saying that I had been juried on to the site!  YAY!!  The jury panel had been to my etsy shop, liked what they saw, and thought my work would be a good fit with the rest of the artists on PFATT Marketplace.  I felt honored, because some of the PFATT artists are nationally recognized. 

I couldn't get started right away because of my workload, but I said YES, I am certainly interested, and I would be pleased to start in October.  So, as of yesterday, I am a PFATT artist!

Here's how it works.  Each artist has her own page with up to three items listed for sale.  Each month on the 10th, the site updates with new items, so every month will bring you different listings.  I plan to list three items each month that will be available exclusively on PFATT Marketplace.  This month I have three wonderful Halloween selections listed.  Here is a peak at one of them:

Just Jack
 
I was playing with some new ideas for Halloween characters, and wondered if it would be silly to make a jack o'lantern with arms and legs.  Well, maybe, but I think he's fun and quirky.  Just Jack is sculpted from orange clay, with striped arms and legs.  His black boots and mitts are trimmed with chenille.  His big grey eyes are handpainted, and he wears a paper polka dot party hat, trimmed with a crepe paper ruff.  He is carrying his favorite spider to scare all the girls.
 
I hope you will go take a look at my PFATT Marketplace page.  And while you are there, be sure to check out all the other great artists as well.  It will be well worth your time!
 
Thanks for stopping by!
Lisa